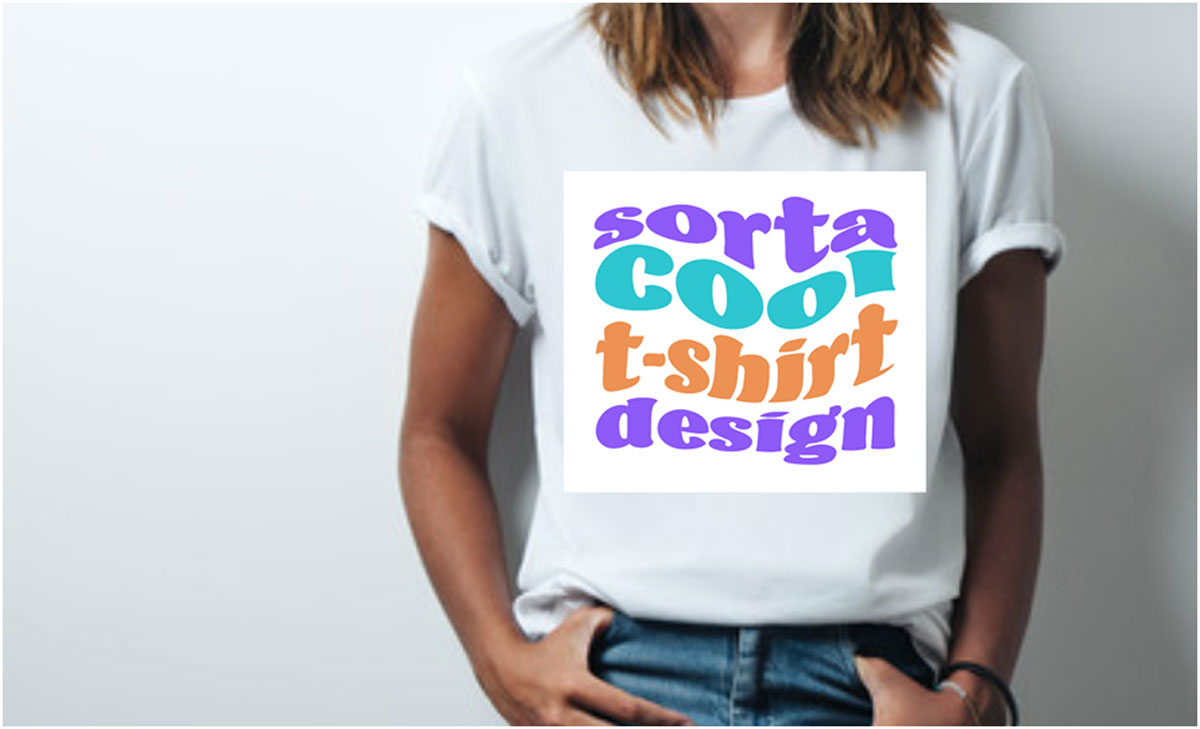
In the competitive world of fashion and e-commerce, presenting your T-shirt designs in the most appealing way is crucial. A well-designed T-shirt mockup can make your products stand out and attract potential customers. Adobe Photoshop, with its powerful design tools, is an excellent choice for creating professional-looking T-shirt mockups. In this step-by-step guide, we’ll explore how to make a T-shirt mockup in Photoshop, ensuring your designs look polished and ready for presentation.
Step 1: Set Up Your Workspace
Before diving into the design process and visit Genera to find mockups, meticulous preparation of your workspace lays the foundation for a successful T-shirt mockup creation. Follow these detailed steps to ensure your environment is optimized for efficiency and creativity.
Open Photoshop and Create a New Document: Launch Adobe Photoshop on your computer. To start a new project, navigate to the top menu and select «File» > «New.» This action opens the «New Document» dialog box.
Set Document Dimensions: The dimensions of your document play a crucial role in determining the visual impact of your T-shirt mockup. Research the standard dimensions for T-shirt designs, considering factors like print area and resolution. A commonly used size for T-shirt mockups is 2000×2000 pixels. Input these dimensions into the respective fields in the «New Document» dialog box.
Determine Resolution: Resolution is vital for ensuring your T-shirt mockup looks crisp and professional. Aim for a resolution of at least 300 pixels per inch (PPI) to guarantee high-quality printing. Adjust the resolution settings in the «New Document» dialog box to meet this standard.
Select Color Mode: T-shirt designs may have different color requirements based on the printing method. Choose the appropriate color mode for your project. For designs intended for web display, use RGB color mode. If you’re creating a design for print, opt for CMYK to ensure accurate color representation.
Step 2: Choose a T-Shirt Template
To streamline the process, find a high-quality T-shirt template that aligns with your design vision. Many websites offer free or premium T-shirt mockup templates in PSD format, providing a foundation for your creativity. Download a template that suits your needs, ensuring it accommodates your design elements, and seamlessly open it in Photoshop to initiate the mockup transformation.
Step 3: Replace the Design
Once the template is open, locate the layer that corresponds to the T-shirt design. This layer is often labeled «Design» or «Artwork.» Double-click on this layer to open it as a separate file. Now, you can replace the existing design with your own.
Import your T-shirt design into this file. Ensure your design is appropriately sized and positioned within the canvas. Use the transformation tools (Ctrl+T or Command+T) to resize and reposition the design as needed.
Step 4: Adjust Colors and Textures
To make your T-shirt mockup more realistic, adjust the colors and textures to match the characteristics of the actual fabric. Select the layer that represents the T-shirt color or texture and experiment with adjustments. Use tools like «Hue/Saturation» and «Brightness/Contrast» to fine-tune the appearance.
If your T-shirt has a specific fabric texture, consider adding it to your design. Use the «Overlay» blending mode to integrate the texture seamlessly with your design, creating a more authentic look.
Step 5: Add Shadows and Highlights
Realistic lighting is key to a convincing T-shirt mockup. Create shadows and highlights to give your design depth and dimension. Identify the light source in the template and use the Brush tool to paint shadows on the areas where shadows would naturally fall. Similarly, add highlights to the areas that would catch more light.
Adjust the opacity of your shadow and highlight layers to ensure they enhance your design without overpowering it. Experiment with different blending modes, such as «Multiply» for shadows and «Screen» for highlights.
Step 6: Incorporate Smart Objects
To maintain flexibility and ease of editing, convert your design elements into Smart Objects. Right-click on the layers that make up your design and choose «Convert to Smart Object.» This allows you to make adjustments to your design without affecting the original pixels, making the editing process more efficient.
Step 7: Work on the Collar and Sleeves
Pay attention to the collar and sleeves of the T-shirt. These areas often have distinct characteristics, and properly addressing them can enhance the realism of your mockup. Use the Pen tool to create selections around these areas and apply adjustments specifically to the collar and sleeves.
Step 8: Fine-Tune Details
Zoom in and inspect your T-shirt mockup for any imperfections or details that need refinement. Check for pixelation, jagged edges, or color discrepancies. Use tools like the Eraser tool, Brush tool, and the Clone Stamp tool to fix any issues and ensure a polished final result.
Step 9: Customize the Background
The background of your T-shirt mockup plays a significant role in the overall presentation. Customize the background to complement your design. Consider using a neutral color, a subtle pattern, or a real-world setting that aligns with your brand or the T-shirt’s intended context.
Experiment with different background elements and observe how they interact with your T-shirt design. The goal is to create a visually appealing and cohesive presentation.
Step 10: Save and Export
Once you’re satisfied with your T-shirt mockup, it’s time to save and export your work. Save your Photoshop file (.PSD) to retain the layers and editing capabilities for future adjustments.
For sharing or uploading to your website, export the final mockup as a high-resolution image. Choose «File» > «Export» > «Export As» and select a suitable file format such as JPEG or PNG. Ensure that your export settings preserve the quality and details of your T-shirt mockup.
Conclusion
Creating a T-shirt mockup in Photoshop is a rewarding process that allows you to showcase your designs in the best possible light. By following these steps, you can produce realistic and visually appealing mockups that captivate your audience and elevate your brand. Experiment with different techniques, be mindful of details, and enjoy the creative journey of bringing your T-shirt designs to life. With a polished T-shirt mockup, you’re well-equipped to make a lasting impression in the competitive world of fashion and e-commerce.
Мокап или mockup — это заранее созданное изображение, макет, куда помещают свой дизайн. Видели на сайтах абсолютно одинаковые футболки с разными принтами или губы с разными цветами помад? Это и есть мокапы, когда на одном объекте (это может быть что угодно: футболка, кружка, визитка, губы, обложка книги, кофейный стаканчик) размещают разные шрифты, логотипы, фоны.
Рассказываем, как сделать мокап самому, какие они бывают, зачем нужны и как работать с готовыми мокапами для Фотошопа.
Какие бывают мокапы
Как сделать мокап
Мокапы для Фотошопа — как с ними работать

Это шаблон со стокового фотохостинга, который легко превратить в мокап / Фото: unsplash.com
Какие бывают мокапы
Мокап помогает увидеть, как дизайн или изображение будут выглядеть на предмете: билборде на улице, экране телефона, блокноте, носках, кружках. Благодаря нему вы показываете заказчику наглядно и реалистично вид будущего продукта. Сами представьте, что лучше: сделать логотип и отправить файлом, либо поместить его на «готовую» бутылку или визитку и показать, каким он будет в жизни?
Это экономит бюджет и даёт свободу. Вместо того, чтобы нанимать фотографа и ретушёра, платить модели за съёмку целой коллекции футболок и всё начинать сначала, если вдруг захочется что-то изменить, достаточно получить одну универсальную модель абстрактной футболки, на которую можно ставить разные принты и публиковать сразу на сайт.
Чтобы понять, как сделать мокап, нужно разобраться в их видах. Одни подходят для новичков, а для других нужно уметь работать сразу в нескольких графических редакторах.
- 3d-модель. Это созданный с нуля «чистый» объект. Чтобы сделать такой мокап, нужно уметь работать в 3d-редакторах: Blender, 3ds Max, Cinema4D и т.д. Если нет времени осваивать новую профессию, модель можно купить у специалиста или попытаться скачать бесплатно.

Пример мокапа в формате 3d-модели / Фото: unsplash.com
- Фото-мокап. Если фотография вам ближе, можно подобрать «стерильный» объект, сфотографировать, отретушировать или найти готовый снимок на стоке, а после накладывать принты, логотипы и надписи в Фотошопе. Например, чтобы примерять дизайны на кружки, футболки, визитки, достаточно сделать по одной фотографии каждого объекта без принта.
- Скачанные мокапы. В интернете можно найти бесплатные мокапы. Это готовые psd-файлы, на которые с помощью Фотошопа можно накладывать свои изображения. Удобно, если готовый мокап подходит по форме. Если же у вашего продукта уникальный дизайн, то без 3d-моделирования или фотосъёмки не обойтись.

Скриншот с сайта с бесплатными мокапами для Фотошопа / Иллюстрация: Елизавета Чечевица, Фотосклад.Эксперт
- Мокапы, созданные на сайтах. Есть множество платных и бесплатных сервисов, где новичок, который никогда не открывал даже Paint, может сделать свой мокап. Достаточно выбрать шаблон и перенести на него свою картинку.
3d-моделирование — это огромная индустрия и сложная профессия, которой не обучиться за пару абзацев. Если нужен индивидуальный мокап и поджимает время, проще всего обратиться к специалисту.
Ниже мы расскажем, как сделать мокап из фотографии и как работать в Фотошопе с готовым мокапом, скачанным бесплатно из интернета.
Как сделать мокап
Если вам важно сделать мокап с нуля и не беспокоиться о том, что готовый скачанный шаблон не подходит и не уникален, воспользуйтесь Фотошопом и нашей пошаговой инструкцией.
1. Сфотографируйте объект сами или найдите на фотостоках. Например, для этой инструкции автор нашёл подходящую фотографию на бесплатном стоке.
2. Откройте изображение в Фотошопе.
3. Возьмите инструмент Прямоугольник / Rectangle Tool. Найти его можно на панели инструментов слева или с помощью горячей клавиши U.
4. Создайте поверх объекта прямоугольник. Для этого растяните его из одного угла в другой левой кнопкой мыши.

Точно размер и форму подгонять не нужно — это чуть позже / Иллюстрация: Елизавета Чечевица, Фотосклад.Эксперт / Фото: piqsels.com
5. В меню Окно / Windows откройте палитру Слои / Layers. Вы увидите слой с прямоугольником, который так и будет называться. Кликните по нему правой кнопкой мыши и выберите Преобразовать в смарт-объект / Convert to Smart Object.

Это обязательный шаг, который нельзя пропускать / Иллюстрация: Елизавета Чечевица, Фотосклад.Эксперт
6. Теперь пришло время подогнать форму! Нажмите по прямоугольнику правой кнопкой мыши и выберите Свободное трансформирование / Free Transform. Это позволит передвинуть прямоугольник, изменить его размер.
Чтобы подогнать будущий мокап под форму идеально, нажмите ещё раз правой кнопкой мыши и выберите Искажение / Distort.

Теперь, передвигая квадратики вокруг прямоугольника, можно сделать форму ещё точнее / Иллюстрация: Елизавета Чечевица, Фотосклад.Эксперт
Если и этого мало, как в нашем случае, потому что стакан округлой формы, нажмите правой кнопкой ещё раз и выберите Деформация / Warp.

Из-за деформации прямоугольник идеально «лёг» на стакан / Иллюстрация: Елизавета Чечевица, Фотосклад.Эксперт
7. Добавляем на макет дизайн! Кликните два раза по слою с прямоугольником — смарт-объект откроется в отдельном документе. Добавьте на этот новый документ с прямоугольником логотип, текст, изображение с дизайном. Если у вас изображение, перетащите его из папки мышью или откройте через команду Ctrl + O. Если вам нужен текст, добавьте его через инструмент фотошопа Текст / Text.

Автор добавил фон, скачанный со стока, а сверху — текст. Всё это происходит в файле смарт-объекта с прямоугольником / Иллюстрация: Елизавета Чечевица, Фотосклад.Эксперт
Важно: когда вы закончите все манипуляции с будущим мокапом, сохраните смарт-объект с прямоугольником. Для этого нажмите Ctrl + S или Файл / File — Save / Сохранить.
8. Изменения применились на файле с кофейным стаканчиком. Если после применения дизайна вы видите огрехи в форме мокапа, повторите пункт шесть. В один файл со смарт-объектом можно добавить множество вариантов дизайнов.

Добавить реалистичности мокапу можно, меняя у слоя с Прямоугольником режимы наложения и непрозрачность. Автор поставил режим Линейный затемнитель / Linear Burn и Непрозрачность / Opacity 79% / Иллюстрация: Елизавета Чечевица, Фотосклад.Эксперт
Чтобы сделать надпись более реалистичной, трансформируйте и её тоже! Для этого откройте смарт объект, выберите слой с текстом и нажмите Ctrl + T. Так вы окажетесь в режиме трансформирования текста. Чтобы придать ему изгиб, кликните по нему правой кнопкой мыши, выберите Деформация / Warp. Деформировать можно как вручную, сдвигая сетку, так и с помощью пресетов — они находятся наверху в строке Деформация / Warp.

Стакан с другим фоном и ручной деформацией текста / Иллюстрация: Елизавета Чечевица, Фотосклад.Эксперт
Важно: чтобы всегда иметь доступ к файлу со смарт-объектом, сохраняйте документ в формате .PSD.
Мокапы для Фотошопа — как с ними работать
А как быть, если создавать свой проект не хочется или слишком тяжело? Естественно, скачать готовый мокап в интернете! Рассказываем, как работать со скачанными мокапами для Фотошопа.
1. Скачайте мокап бесплатно или купите на специальном сайте. В любом поисковике по соответствующему запросу найдется много ресурсов.
2. В результате вы получите архив с файлом в формате PSD. Разархивируйте его и откройте документ в Фотошопе.

Вы увидите мокап в формате .PSD со множеством групп и слоями в них. Они все подписаны, а те, которые поддаются изменению — выделены красным / Иллюстрация: Елизавета Чечевица, Фотосклад.Эксперт / Мокап: Tatiana Teplukhina, psdmockup.ru
3. Меняем цвета и изображение.
Чтобы изменить цвет крышки, нажмите дважды на красный квадратик на слое, который называется Change Cap Color, а для изменения фона — на нижний серый квадратик, названный Change Background Color.
Чтобы изменить главное — логотип — дважды нажмите на слой смарт-объект, который называется YOUR IMAGE HERE. Вы окажетесь в отдельном документе смарт-объекта, где находится только базовый логотип. Вставьте поверх него любую картинку, логотип, надпись и нажмите Ctrl + S или Файл / File — Save / Сохранить.

После сохранения результат тут же отобразится в файле с мокапом / Иллюстрация: Елизавета Чечевица, Фотосклад.Эксперт
4. Готово. Чтобы в любой момент у вас был доступ к мокапу со всеми слоями, сохраняйте его в формате .PSD. Так его можно передавать другим людям, которые смогут его открыть в таком же виде и с такими же настройками.
Learning how to make t shirt mockup in Photoshop to create a shirt mock-up can give designers an advantage, whether they’re entering a shirt design contest or promoting printed shirts for sale.
Shirt mockups can improve designs and give customers a clearer idea of what the final product will look like.
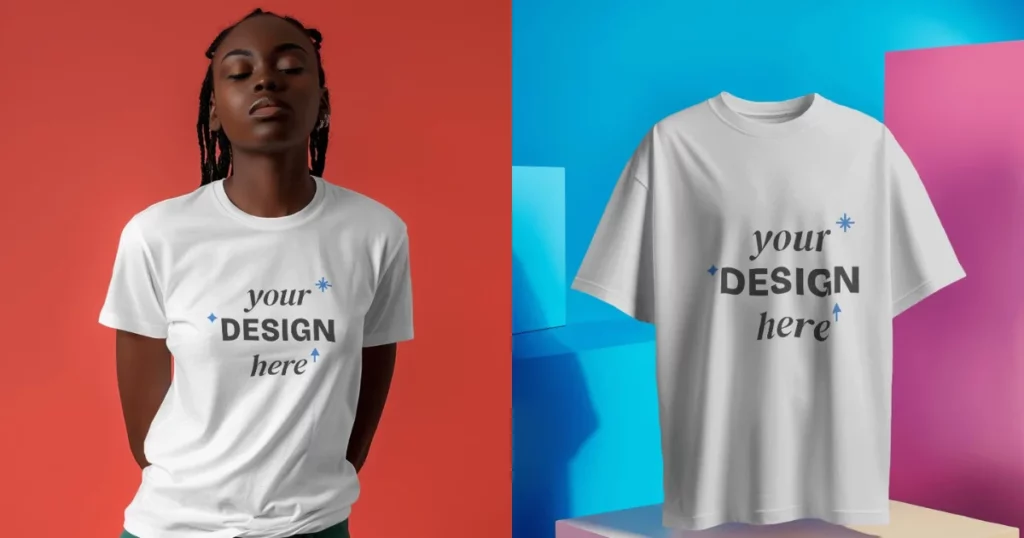
Table of Contents
A Quick Guide on How to Make T Shirt Mockup in Photoshop
The quick guide on how to make t shirt mockups in Photoshop in a few steps.
- Import a graphic or use the one provided.
- Right-click the graphic layer, and select “Convert to Smart Object” to prepare for warping.
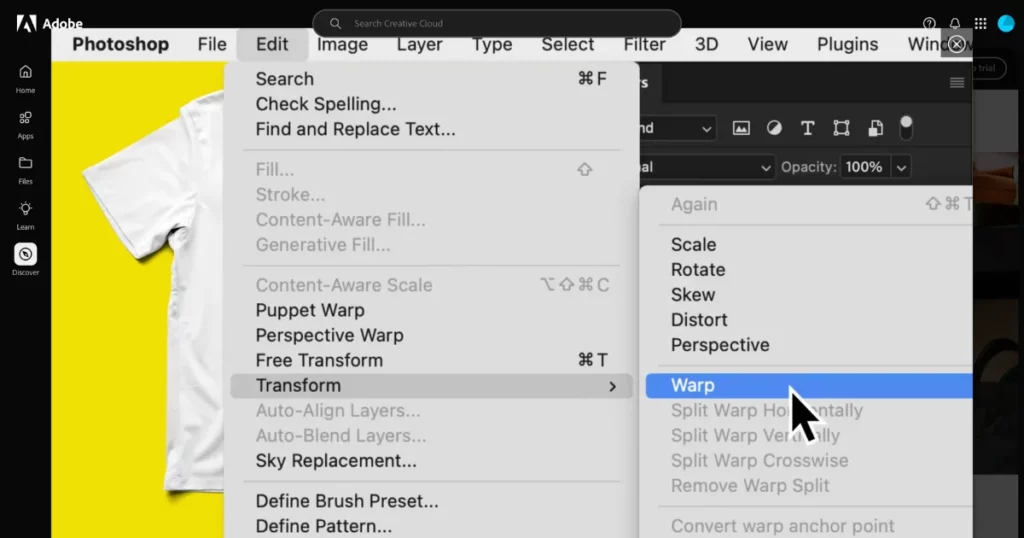
- Use Edit > Transform > Warp to fit the graphic to the shirt’s folds; adjust opacity for realism.
- Add a Layer Mask, select a soft round black brush, and brush along the shirt’s movement for a realistic lighting effect.
- Swap backgrounds by double-clicking the color swatch in the Backgrounds layer group or toggling other background layers.
How to Make T-Shirt Mockups in Photoshop – Step-by-step Guide
Here is a step-by-step guide to show you how to make t shirt mockup in Photoshop.
Step 1: Import a Graphic
To start, import your graphic into the project. Go to File > Place Embedded to add your own graphic. Alternatively, click the small box next to the Boogie Graphic layer to use the graphic in the practice file.
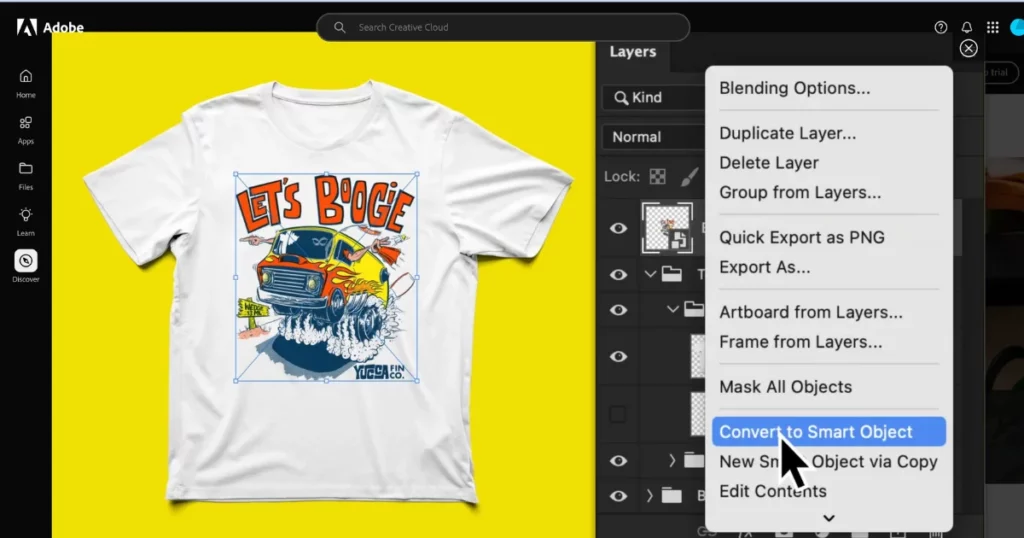
Step 2: Convert to Smart Object
Right-click on the graphic layer you just added. Choose Convert to Smart Object. This allows you to make adjustments, like warping, in the next step.
Step 3: Fit the Graphic to the Fabric
Go to Edit > Transform > Warp. Drag the handles to shape the graphic, so it matches the folds and movement of the t-shirt. Adjust the Opacity of the graphic layer to blend it seamlessly with the fabric’s texture, making it look realistic.
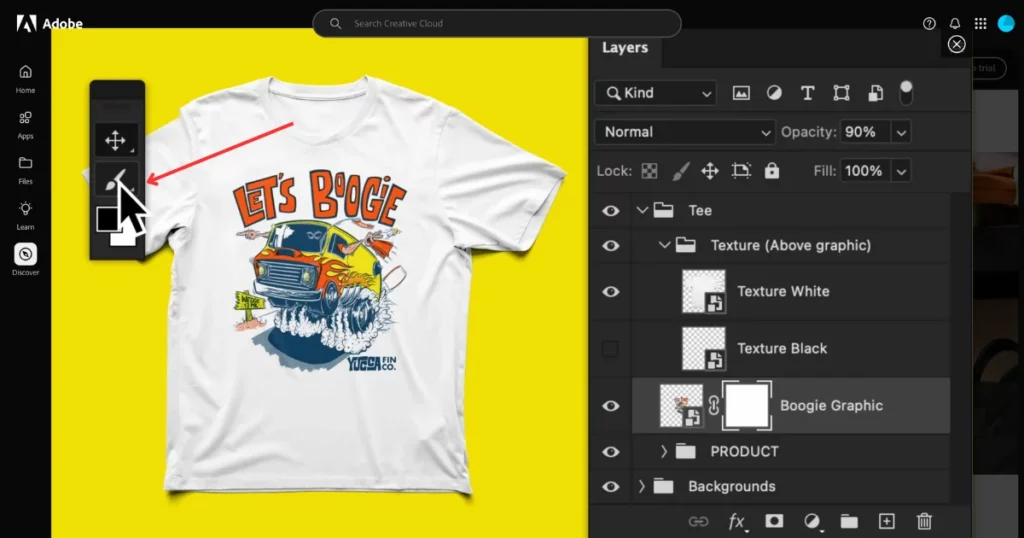
Step 4: Add a Layer Mask for Realistic Lighting
Click the Layer Mask icon at the bottom of the Layers panel to add a mask to the graphic layer. Select the mask thumbnail.
Choose a soft round black brush with low opacity. Brush along the shirt’s movement to enhance the lighting effect and make it look more natural.
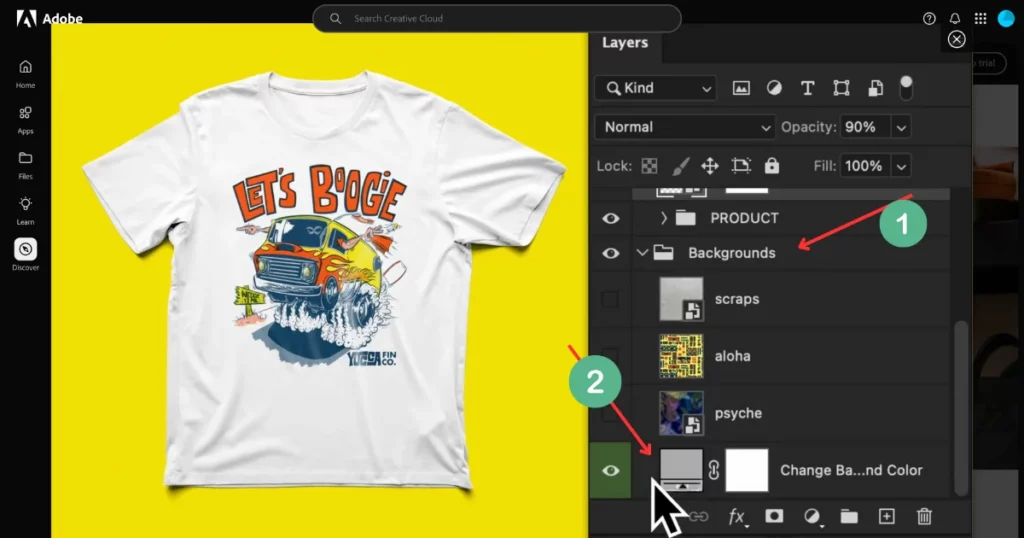
Step 5: Experiment with Backgrounds
In the Backgrounds layer group, double-click the color swatch to try out different colors. You can also experiment with different textures by turning other background layers on or off.
We have learned how to make t shirt mockup in Photoshop and go through a step-by-step process. Now look for a free mockup generator that can generate t-shirt mockups in seconds.
Make T-shirt Mockups with Mockey for Free
Mockey is one of the best mockup tools to create product mockups right now. To make T-shirt mockups using Mockey, follow these easy steps:
Step 1: Open Mockey.ai
- Launch Mockey.ai.
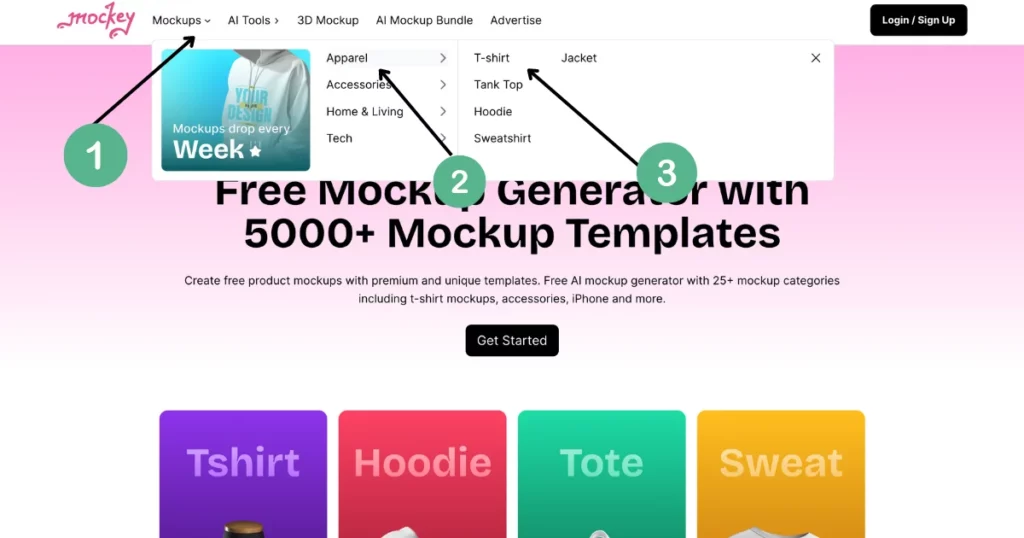
Step 2: Choose T-shirt Category
Click on “Apparel” in the top menu and select “T-shirt” to get to the design section.
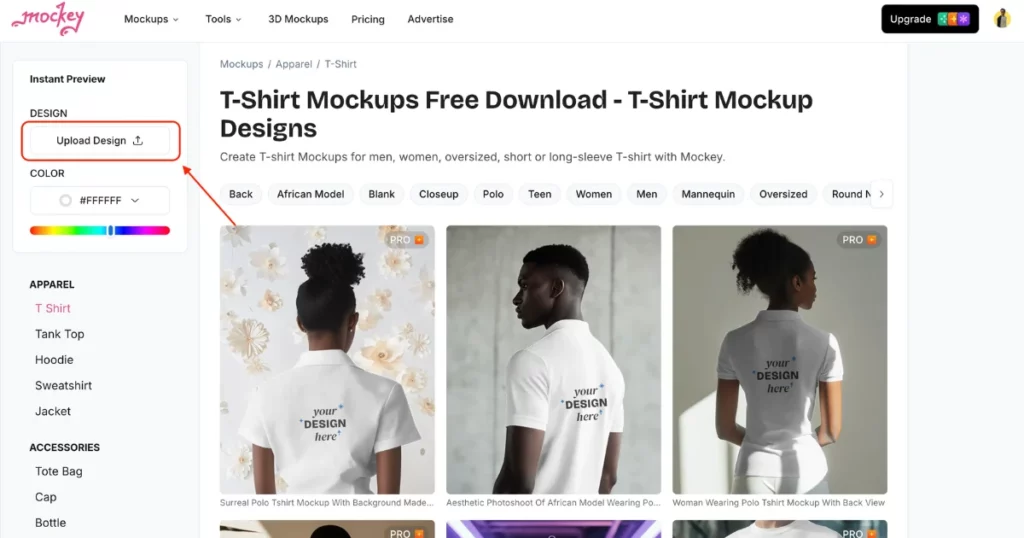
Step 3: Upload Your Design
Click on “Upload Design” in the top left corner. Upload your design or logo in PNG or JPG format from your computer.
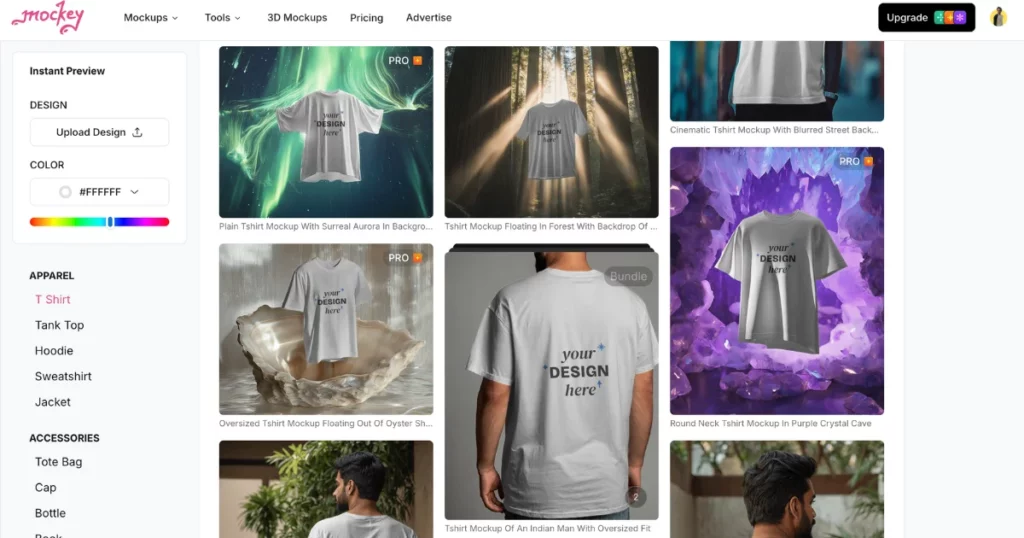
Step 4: Pick a Template
Browse through the available T-shirt templates and select the one that matches your vision.
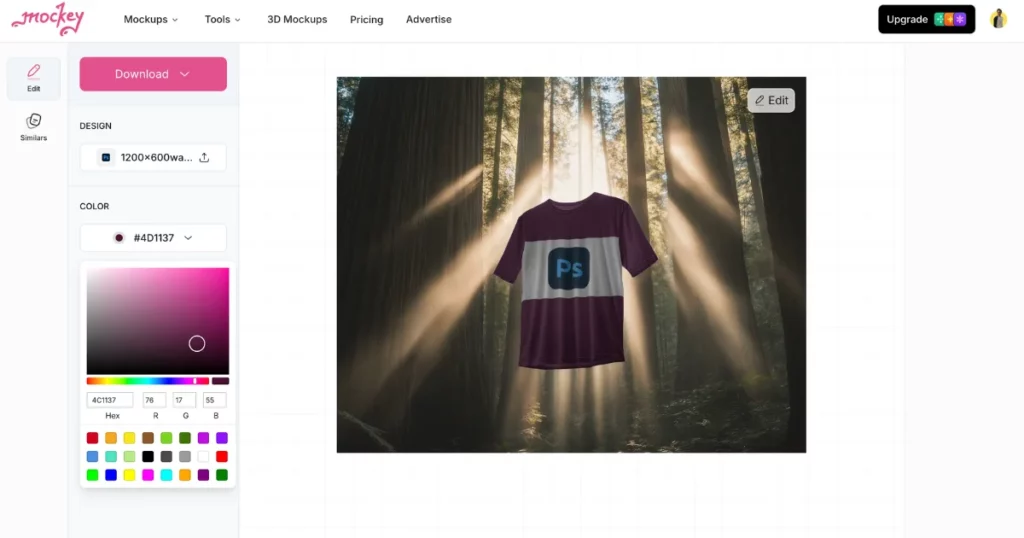
Step 5: Customize Your Mockup
Now customize the T-shirt color, resize your design, and adjust the background.
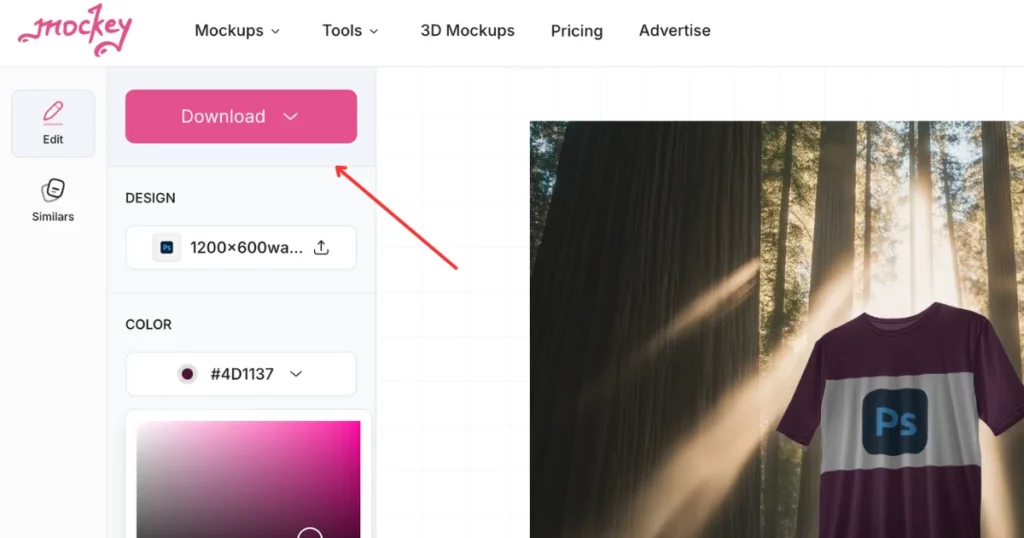
Step 6: Download Your Mockup
When you’re happy with your design, click “Download” to save it as a JPG or PNG file without a watermark.
T-shirt Mockup Designs to Download for Free
1. Back T shirt Mockups
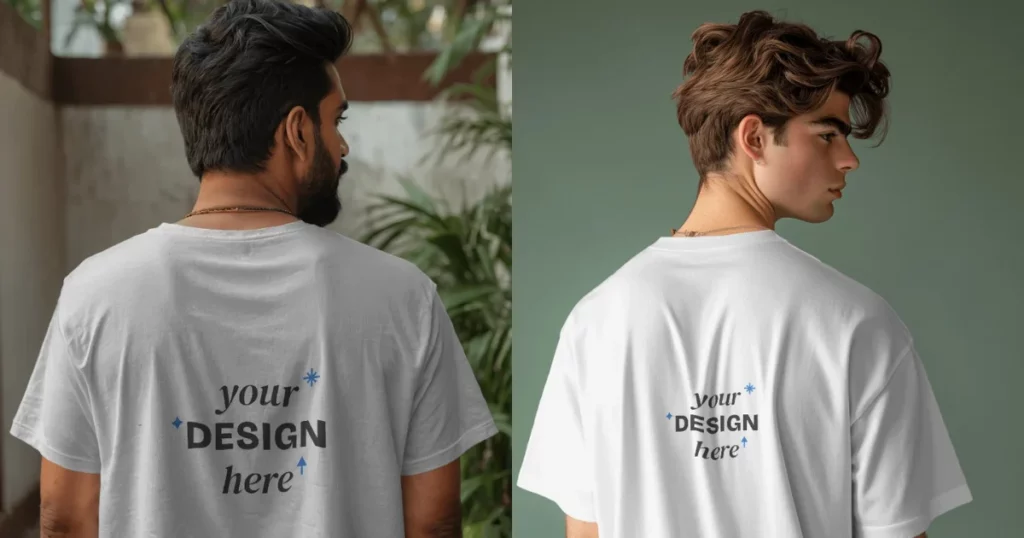
2. African T shirt Model Mockups

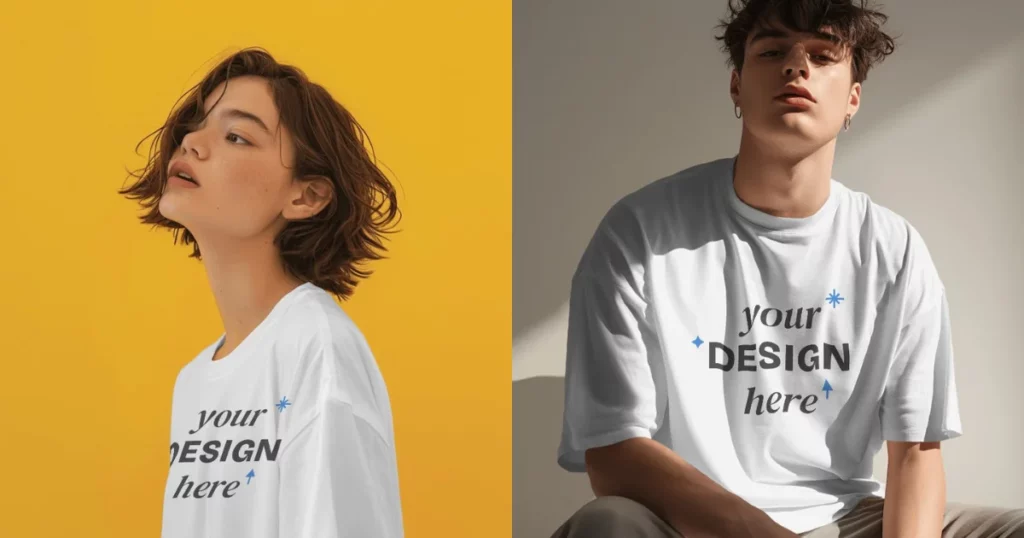
3. American Model T shirt Mockups
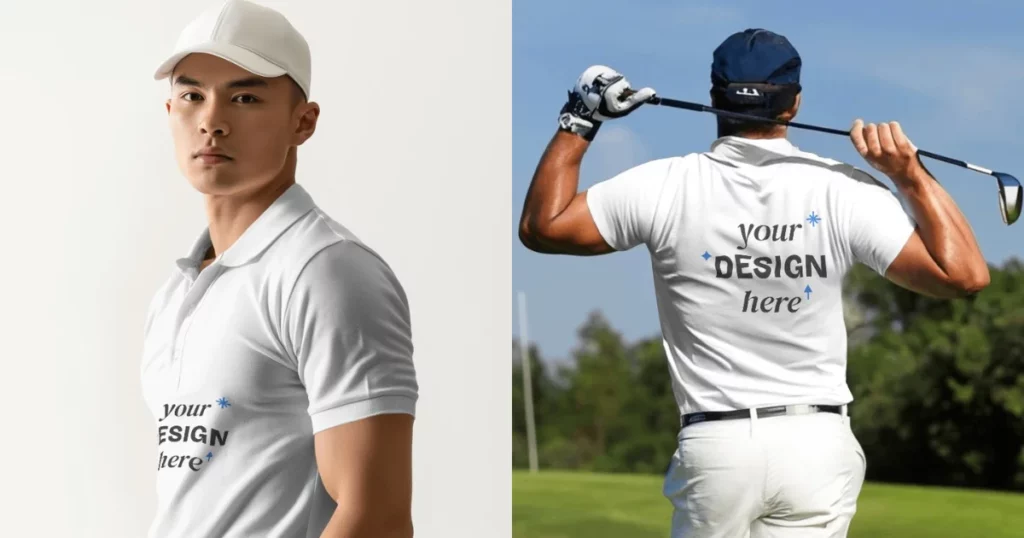
4. Polo T shirt Mockups
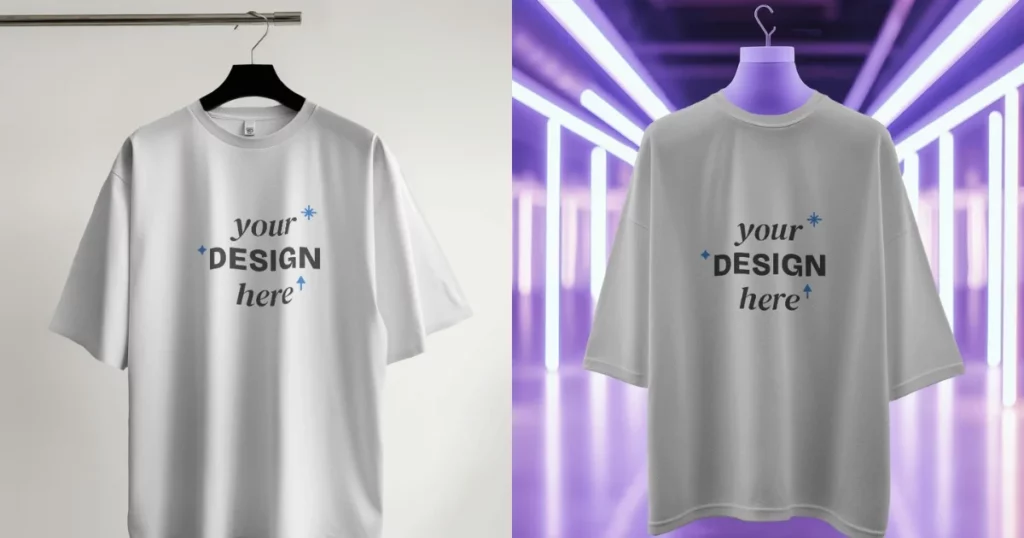
5. Oversized T shirt mockups
6. Round Neck T shirt Mockups
7. Long Sleeve T shirt Mockups
8. V Neck T shirt Mockups

9. Couple T shirt Mockups
10. Mannequin T shirt Mockups
Conclusion
This article provides a guide on how to make t shirt mockup in Photoshop. By following it, you can create a t-shirt template to easily preview how your designs will look when printed.
Using Adobe Photoshop is a great way to create visuals that you can take to print shops to show how you like them to look.
It’s also useful if you’re selling a personalized T-shirt online and want to deliver a preview for customers so they can see what the T-shirt will look like before buying.
Also, you can use Mockey to create product mockups for user friendliness and unlimited free download mockups without any watermark.
FAQs
How to make a tshirt mock up in Photoshop?
To create T-shirt mockups in Photoshop, import a graphic and convert the layer to a Smart Object. Use Transform > Warp to fit the graphic to the shirt’s folds, adjusting opacity for realism. Add a Layer Mask and brush for realistic lighting effects. Finally, change backgrounds by adjusting the Background layer’s color or toggling other layers.
How do I make my own t-shirt mockup?
To make your own t-shirt mockup, visit Mockey and select Mockups. Choose Apparel, then T-shirt. Upload your design, customize the color, background, and size, and download your mockup for free without a watermark.
How do I create a custom mockup in Photoshop?
To create a custom mockup in Photoshop, open a background image. Draw a shape over the product area using the Shape tool. Convert this shape to a Smart Object, then insert and adjust your product image.
How do you make something look like it’s on a shirt Photoshop?
To mock up a design on a T-shirt in Photoshop, start by finding a plain T-shirt image. Place your design on top, then resize and position it as needed. Finally, set the design layer to “multiply” to blend it with the shirt’s texture, creating a realistic effect.
Related reading:
- 10 Best T Shirt Mockup Sites
- What is a Mockup? Its Types and How to Create for Free
- Wireframe vs Mockup vs Prototype
- How to Make a Frame Mockup in 3 Easy Steps
- How to Make a Mockup: Create Mockup Online Without Photoshop
- How to Make Book Mockups for Free
- 10 Best Mockup Websites for Stunning Design Templates